项目构建
主要参考Allo doc的set up章节,这里我选择源码构建的方式。项目构建流程如下:
clone项目
1
git clone --recursive git@github.com:micropuma/allo.git
构建llvm子项目
1
2
3
4
5
cd allo/externals/llvm-project
Apply our patch
git apply ../llvm_patch
Python 3.12 is required
mkdir -p build由于需要python bind11,以及后续需要pip install很多python库,因此这里推荐用conda创建虚拟环境:
1
2
3
conda create -n allo python=3.12 # python版本一定是3.12
conda activate allo
pip install pybind11编写shell脚本,一键构建llvm:
1
2
3
4
5
6
7
8
9
10
11
12
13
14
cd build
cmake -G Ninja ../llvm \
-DLLVM_ENABLE_PROJECTS="clang;mlir;openmp" \
-DLLVM_BUILD_EXAMPLES=ON \
-DLLVM_TARGETS_TO_BUILD="host" \
-DCMAKE_BUILD_TYPE=Release \
-DLLVM_ENABLE_ASSERTIONS=ON \
-DLLVM_INSTALL_UTILS=ON \
-DMLIR_ENABLE_BINDINGS_PYTHON=ON \
-DPython3_EXECUTABLE=`which python3`
ninja -j $(nproc)
export environment variable
export LLVM_BUILD_DIR=$(pwd)构建Allo项目,首先回退到项目根目录,运行如下命令:
1
python3 -m pip install -v -e . -i https://pypi.tuna.tsinghua.edu.cn/simple # 建议用清华镜像,否则容易拉取失败
Allo项目使用
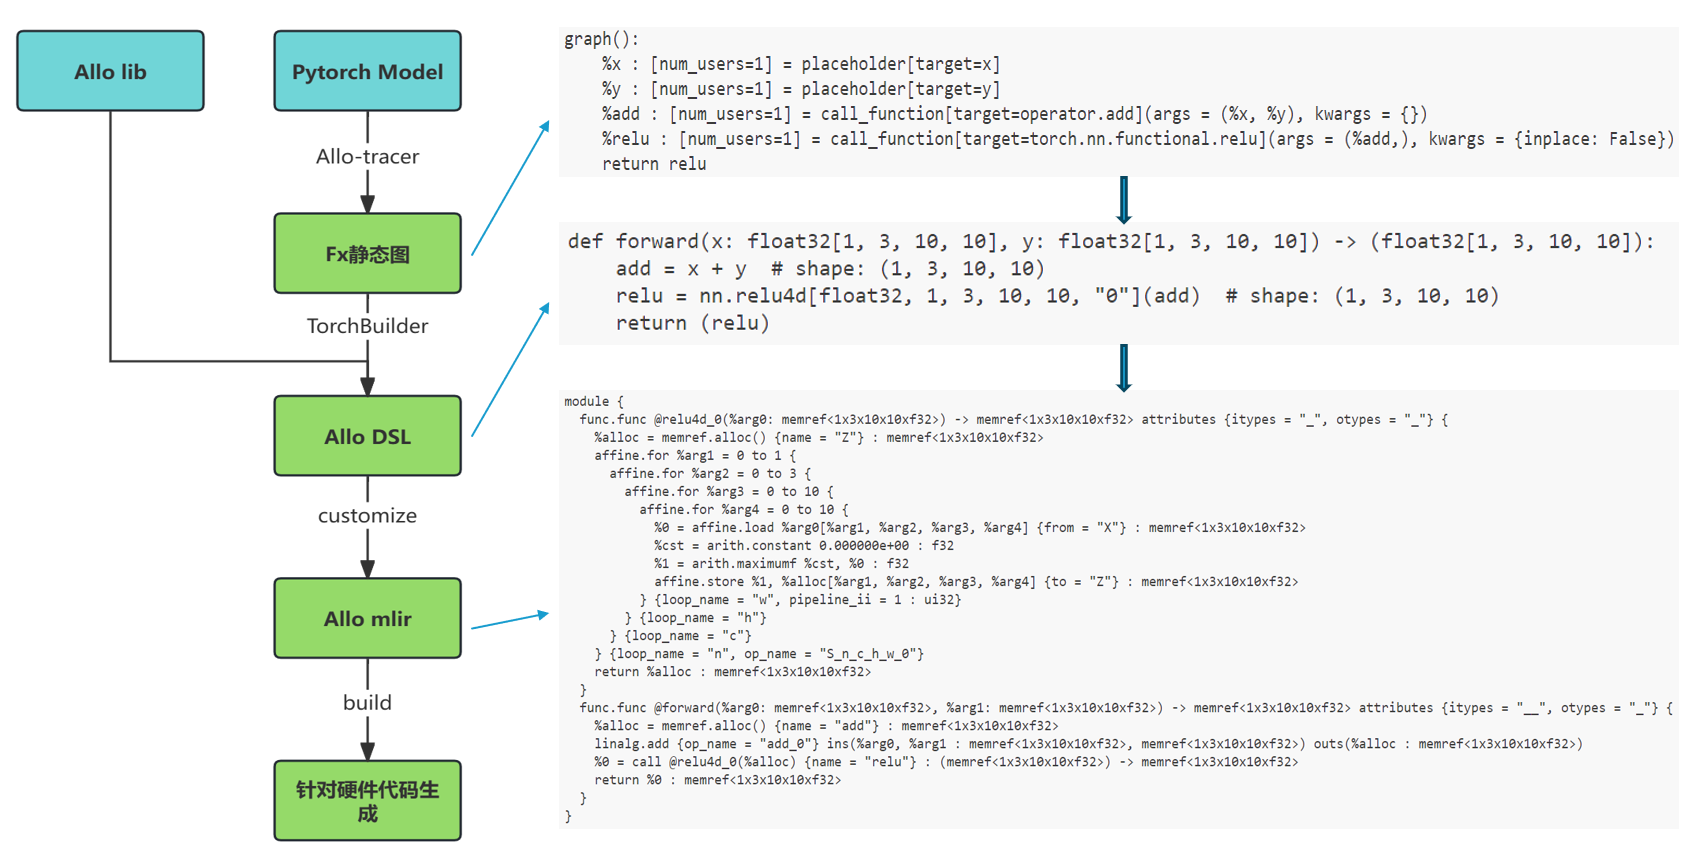
Pytorch集成例子
Allo项目除了使用ADL(加速定义语言)来描述计算任务外,也可以集成在pytorch中使用。具体参考allo pytorch集成例子。
具体代码如下:
1 | import torch |
执行如下scirpt:
1 | !/bin/bash |
:key:注意,由于conda环境中的libstdc++版本低,可能会在import allo的时候报错。强制指定系统libstdc++版本即可。
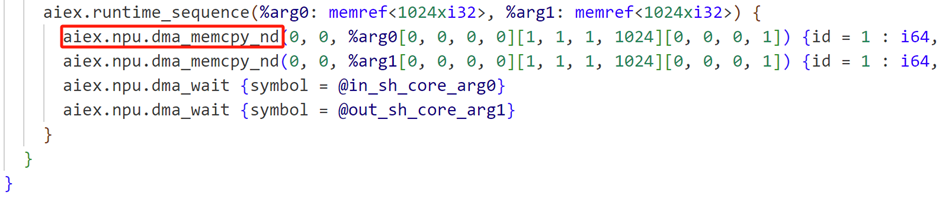
Allo AIE集成
Allo项目目前可以集成AIE后端了,目前只局限于aie2(NPU)。该流程是端到端的编译流程,支持从pytorch或是huggingface上的模型lower到aie后端,并执行。具体流程如下:
目前存在的流程问题:
Pytorch只能target到cpu和fpga上,目前没有支持pytorch到aie的端到端流程。
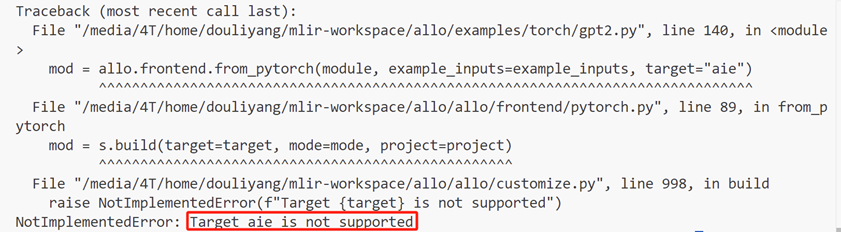
对于aie,目前allo支持用python编写算子,并且只能支持aie2(NPU),没有支持VCK190。
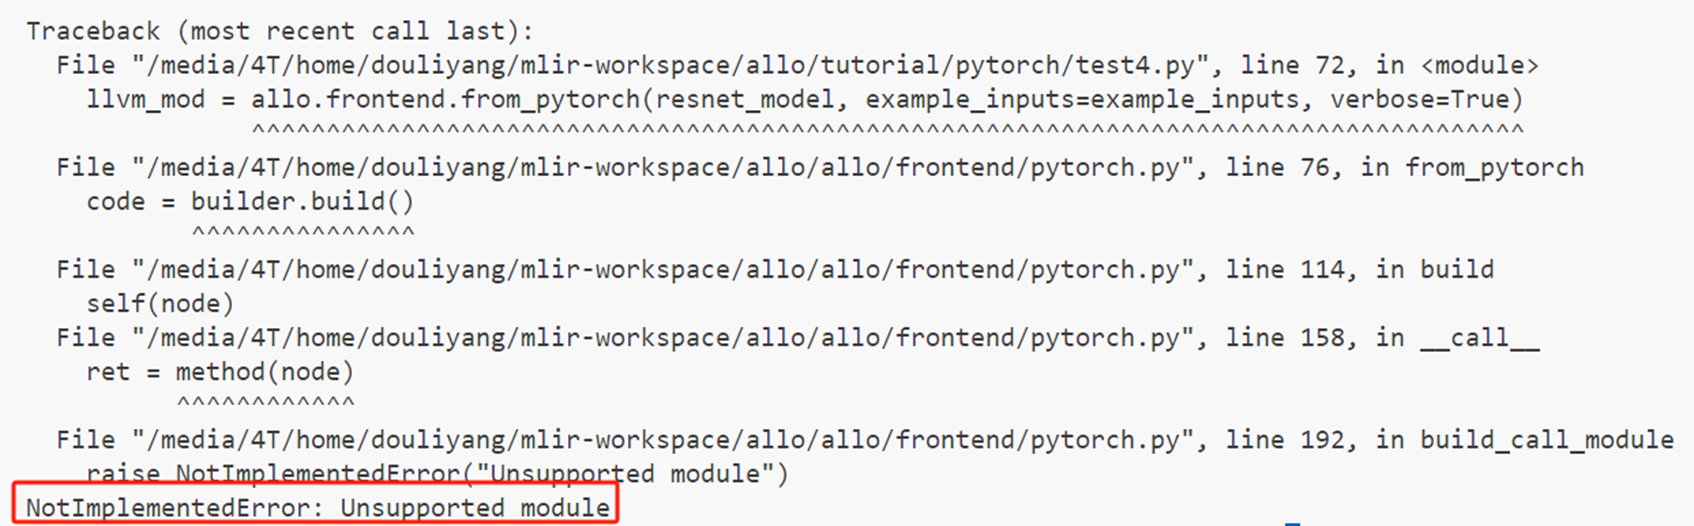
Pytorch算子支持受局限。
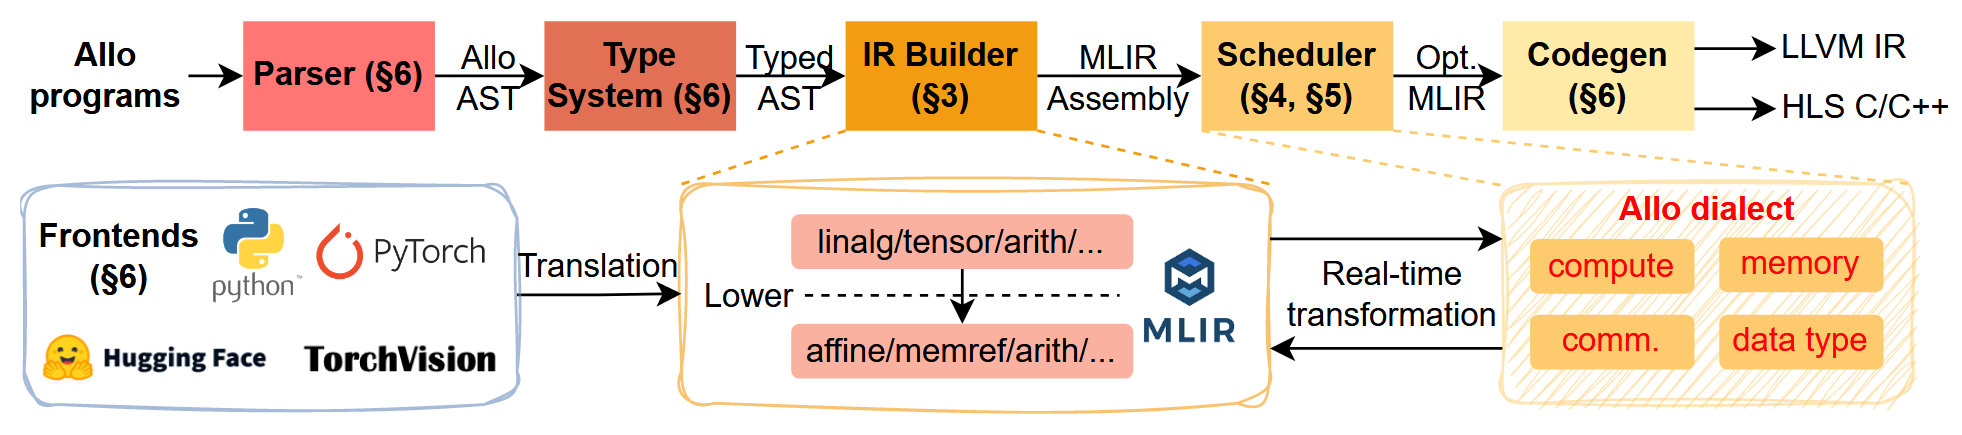
Allo项目架构
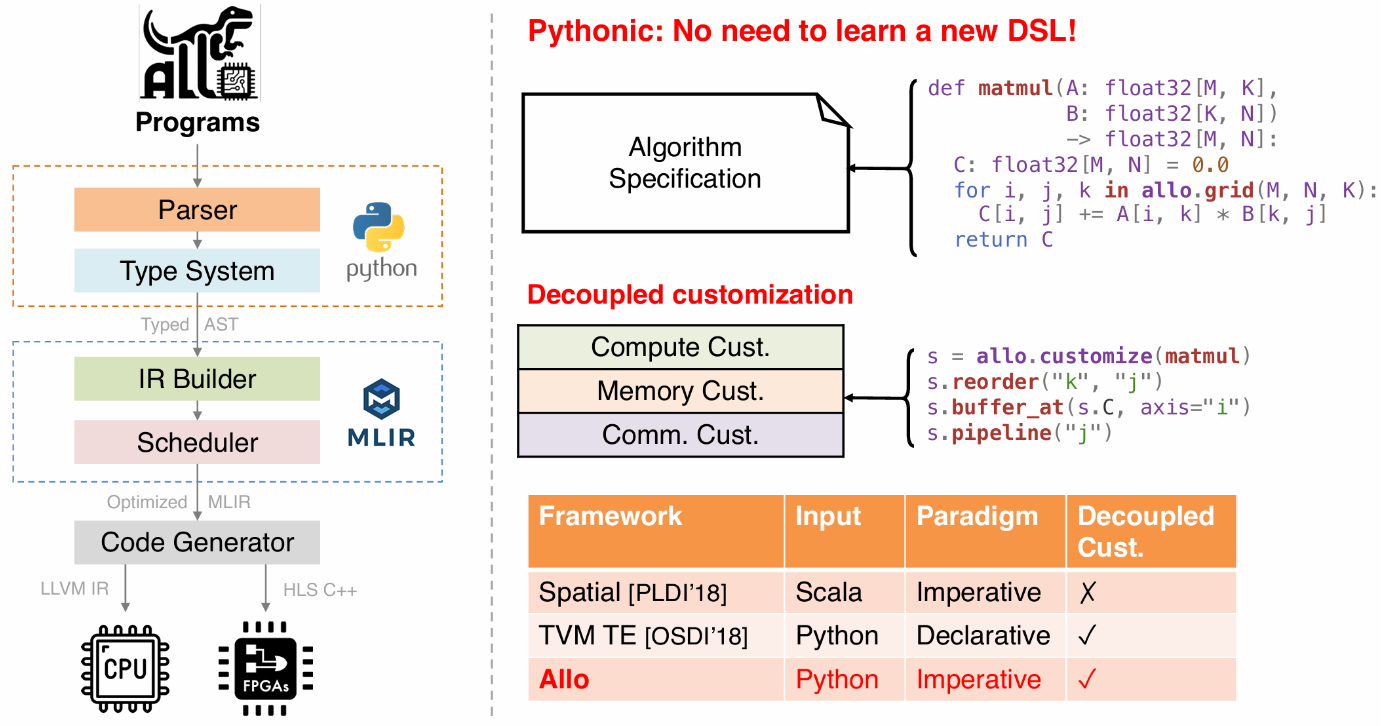
前端
Allo项目在前端使用python语言编写,主要完成python系统和pytorch系统到mlir系统的接入。针对pytorch系统,用于可以使用torch.compile(model, "allo")将pytorch代码编译成allo的中间表达形式,借助于TorchDynamo系统。具体的,基于torch.fx作为高层ir,将其中的每一个pytorch计算单元翻译成allo的function call,后续转换和优化交由allo来完成。硬件无关优化比如算子融合在torch系统中完成,而硬件相关优化则由allo完成,两者是正交关系。
代码生成
用户通过s.build(<target>)来针对指定硬件生成代码。目前支持的后端硬件有:CPU,AMD的fpga以及AMD AIE(Ryzen AI)。
中间优化
这一部分完全在mlir系统中完成所有的优化。
Allo项目的框架是比较简单的,后续会结合源代码详细解读。